By Trestkon
Date Created: 6/22/2002
The 2D Shape Editor is just another one of
those experimental but incredible useful little programs that they added to the
SDK. This tutorial will teach you all you need to know about this little gem.
Prerequisites: Can you point and click? If you can't then you better learn.
Open up UnrealEd and create a box with the dimensions 255, 512, 512. We will use this box to build our 2D shapes in. Now, to get your first
glimps of the 2Dshape Editor click on Window => 2D Shape Editor and
you should get a window just like the one below.

I know that this probably looks a little daunting but don't worry, I will take
you through it step by step. You can ignore the green cross for now, that just tells you where the center of your shape is. Basically, this is how it works, all of the corners of the triangle are vertices, which are the place where two lines intersect, all of these vertices can be moved around to any point on the grid.
The lines that you can see on the screen are a 2 dimensional representation of the final shape, to get an idea off what I mean click Loft => Extrude a window will appear but you will probably have to move the main 2D Editor window
out of the way as the new window appears behind it. Once you have moved the 2D Editor window out of the window you should be able to see the 2D Extruder Window.

This window lets you turn your shape into a brush. The loft plane area allows you to change the orientation of the brush and you can just ignore the Group Name. The important part is the Depth box, this controls how deep (or long) your shape will be, it uses regular Unreal units. For now, just leave all of these things as they are and click Build. When you have done so your shape will be rendered into a brush which can then we added or subtracted as usual. You should get something like this, but you can play with the depth and Loft Plane to see what they do.

So now you know the basics, but believe me, this little program can do a lot more than just make a triangle.
Onward & Upward
What I'm going to do is teach you how to create a curved pipe, this will teach you something useful while at the same time allowing you to learn many of the functions of the 2D Shape Editor. Start it up again and this time we are going to try a bit of vertex editing, I'm going to put a lot of pictures in here to help you understand this as it may be a bit confusing.
The first thing you have to do is inset and new line, which will add 2 new vertices for you to edit. Click on the vertex at bottom left corner of the triangle, a circle will appear around it
and the bottom side of the triangle will be highlighted (bold).
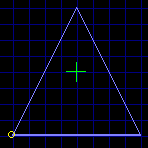
If you hold down the mouse on that corner you will be able to move the vertex around, but for now, just leave it where it is. Click on the vertex again and the left side of the triangle
will become highlighted. To insert a new side press Control + I or click Vertex => Insert and a new side will appear in the middle of the highlighted one.
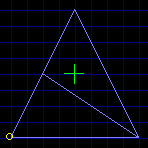
Now click on the vertex at the left end of your new line to highlight the upper left side of the triangle and add in another vertex.
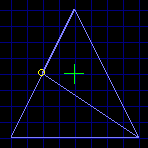

I suppose you're wondering how this freakish looking triangle is going to become
a pipe, so here we go. First, move the vertices around so that they look like this:

Now you just need to keep adding vertices and rearranging them so that you get a circular shape, so make sure that the top line is highlighted like in the picture above and insert another vertex. Continue adding vertices by
highlighting an outside edge of the shape and pressing Control + I and rearrange
them into a shape like the one below.
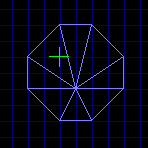
Now that we have our circle shape we want to use the extrude function just like we did earlier so that we can turn it into a pipe section. Go to the extrude menu, but this time change the depth to 128 and change the loft plane to Y (hall outline) so that the pipe section will have the orientation that we want. Don't close the shape editor just yet, we will need it again soon.
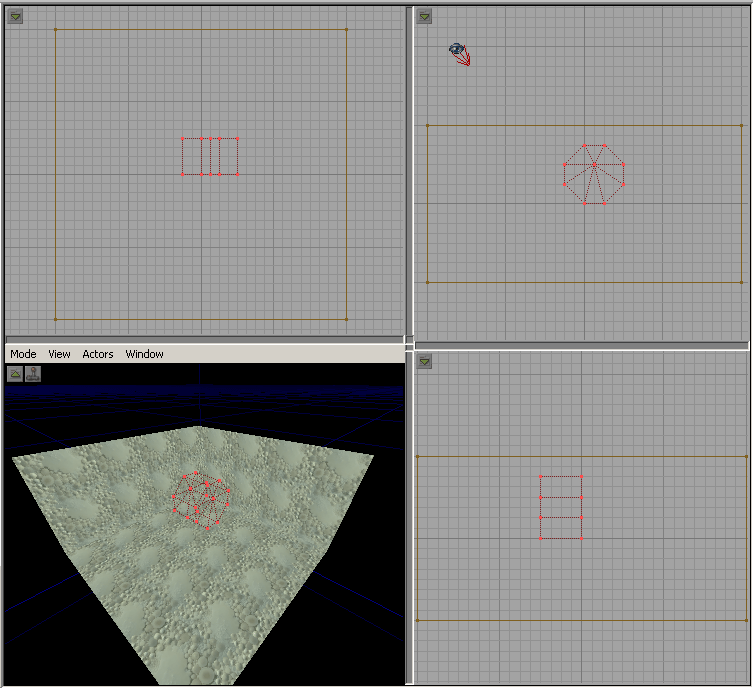
Position the pipe so that it is right next to a wall and about 16 units from the ceiling. And add it.

Now for the curved part, go back into the 2D Editor (you didn't close it, did you?)
Click on the green cross and drag it about 3 grid units to the left of the shape.
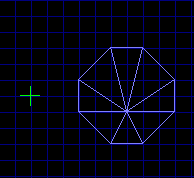
This part might be a little hard to understand so I'll start from the beginning. What we are going to do first so that you understand is turn our shape into a torus (donut shape). The green cross shows the center of that donut. Select Loft => Revolve and you will get this menu:
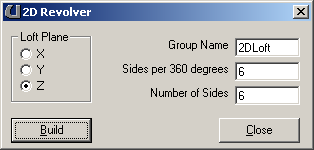
For now, just leave everything how it is and press build to get your torus.
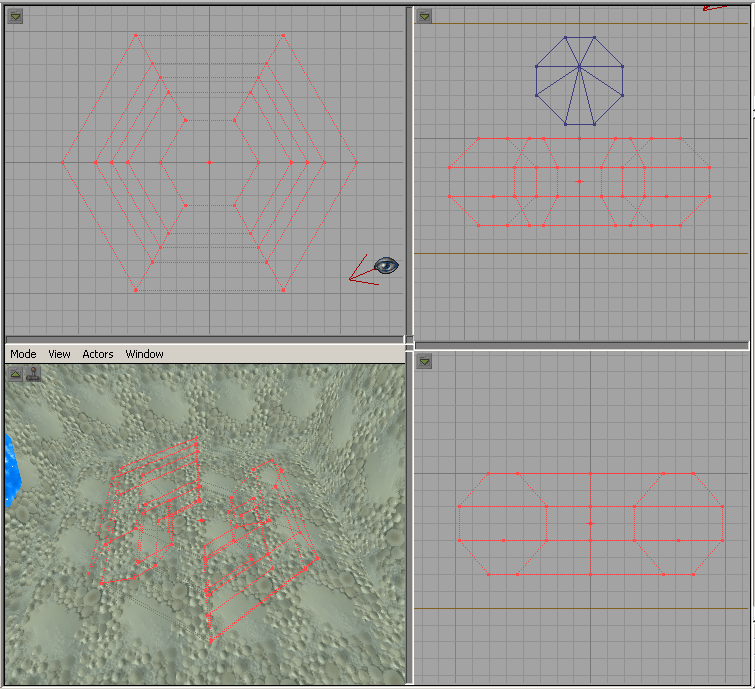
As you can see, you now have a donut shape with 6 sides, if you wanted it to have more sides just change the Sides per 360 degrees and Number of Sides in the 2D Revolver window. You can also see that the shape you made is sort of like a pie slice of the torus, at first, it may be hard to picture what your torus will look like but with a bit of experimentation you will get the hang of it. You can also change the size of the hole in the middle just by moving the green cross, if you put it right up against the side of the shape
there will be no hole in the center at all, but the further away from the shape you put it, the bigger the hole gets.
That was just to teach you how to operate the revolver but we don't really want a donut, we just want a curved section of pipe, so go into the revolve menu, but this time change the Sides Per 360 Degrees to 16 that will make the circle
nicer to look at. And now, for the most important part, change the Number Of Sides to 4, this will tell it to only render four of the sides into a brush, making a nice quarter circle which we will use for our curved pipe. Also, change the Loft Plane to Y so that it will have the orientation we want. An build the brush.

When you have built the brush line it up so that the top opening aligns with our existing pipe and the rest curves down, now add it and you should have a nice pipe just like below.
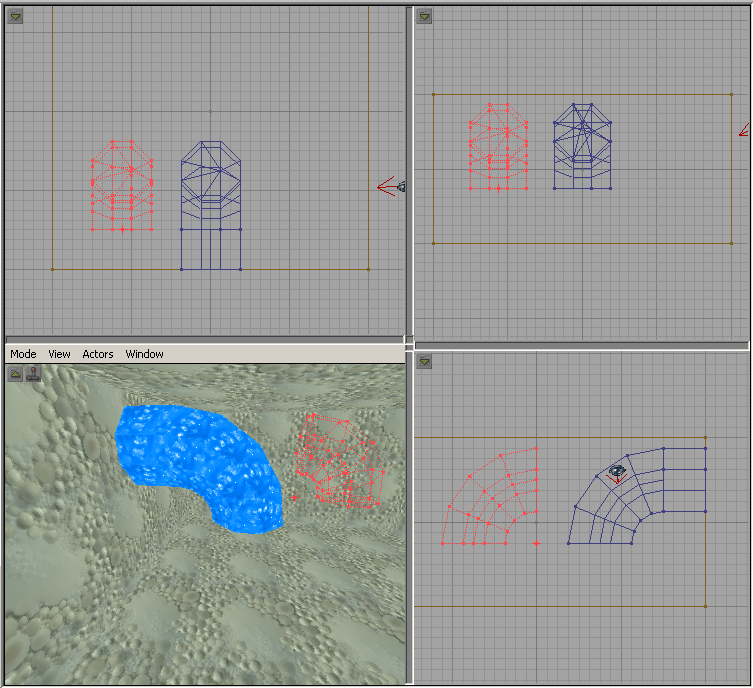
Now just extrude another straight section of pipe and extend it from the bottom of the curved section to the ground to complete your pipe.

Note: To easily change the size of your shapes you can scale them by going to Shape => Scale Scaling in makes them smaller, and out makes them larger
| 


