By Trestkon
Date Created: 7/17/2002
Ahhhh, ConEdit, your conversations will be that spice that will make your levels
that much better. Once you know the basics you will be able to to go out on your own and create as many conversation as you wish, but first, you must learn the basics, so read on.
Prerequisites: Package Tutorial
Conedit is the program that you will use to create all those neat conversations for your
levels, but it can be frustrating to figure out all those boxes and buttons and widgets, but that's why I'm here. After you have
installed ConEdit start it up and you should get a nice logo screen like the one below.
Conedit Intro Window

To get started, click on the "File" menu and then "New" and you will get this menu.
Conversation File Properties
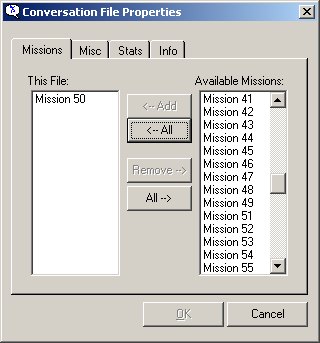
The "Conversation File Properties" window will pop up. This window has 4 tabs, the first two
contain important settings. The "Stats" tab will tell you things about your file once you have made a conversation and the "Info" tab tells you then the file was created, by who and when it was last modified. Now we will go over the first two
tabs, which are the most important.
In the "Mission" tab you must select the mission number that your conversations are from,
missions 1-15 were used in the game, they are not available, so do not choose them. Select mission 50 and click "Add"
Now click on the misc tab, this is where you have to set the Audio Package, the Audio Package is the name of the subfolder in your package folder were you would store the audio files for your conversation, for this tutorial we are not going to have any audio, but you should put "Mission50" in this tab just so you get in the habit of
doing things right. You can also put in some notes for yourself.
Misc Tab
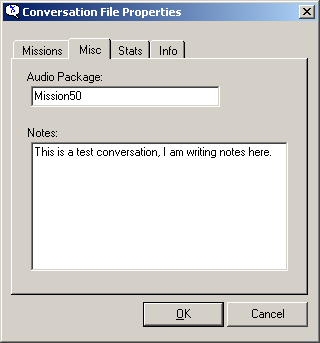
Now that you have filled in all of the critical boxes click ok and you should get a blank
conversation window, like this,
New Conversation Window
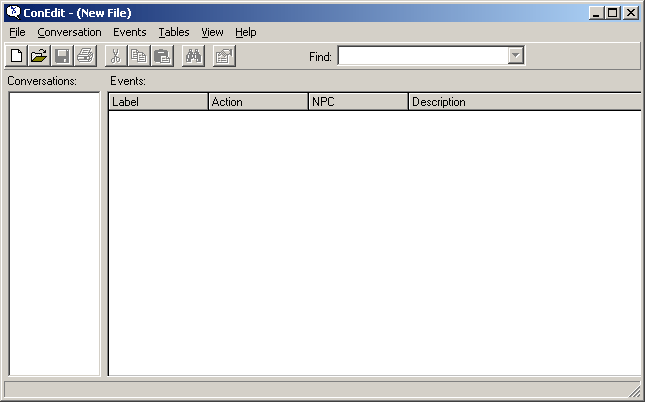
The left frame or bar will contain all of the actors and the conversations that they own, you
will understand this better a little later. The right frame will have the actual conversations in it. Now, to create your first conversation, click Conversation => Add Conversation.
Conversation Properties Window

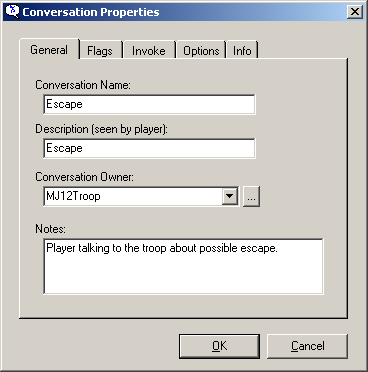
A window like the one above will pop up, it has 5 tabs which I will go over in order of
left to right. The pictures will also have all of the sections filled out so you can copy them right out of the pictures.
The general tab actually only contains one important setting, but I will explain them all.
The first box is the Conversation Name, this is just a name used to discribe the conversation, it has absolutly no affect on anything, so have a ball. The Description box, even though it says "seen by player" is not in fact seen by the player, I suppose that they just decided not to use it, so, again you can put whatever you want in this box. The last box, however, is very important, the Conversation Owner is the BindName of the NPC that the player is talking to. In the picture I have put MJ12Troop, which is the bindname for, you guessed it, the MJ12 Troop! The first time that you enter a bindname a notice
saying "This entry does not exist in the table, would you like to add it?" will pop up, select yes, and from now on you won't have to type that particular name, just click on the down arrow and select the it. You can see and edit the table by clicking the elipsis (three little dots ...) next to the text box. You can add Bindnames to the table directly from the Actors/Pawns window below or just view the ones that are already in the table.
Clicking the arrow lets you see NPCs already in the table

Editing the table

Remember that BindNames can not have any spaces. And finally you can fill in the "Notes" section with a few discriptive sentences about your conversation.
General Tab
The next tab is the flags tab, this tab will be used in my more advanced ConEdit tutorials.
Now click on the Invoke tab, "Invocation Methods" is a fancy name for how the conversation is triggered. The different methods are defined as follows:
PC Frobs NPC => The conversation is activated when the player right clicks on the NPC
Player Bumbs NPC => This does the exact same thing as PC Frobs NPC, both of these are checked by default and since they both do the same thing you can just leave both of them checked
NPC Enters PC Radius => The conversation is activated when the player gets within a certain
distance from the NPC, this is measured in Unreal Units which you enter into the little text box right under this option
Invocation Methods
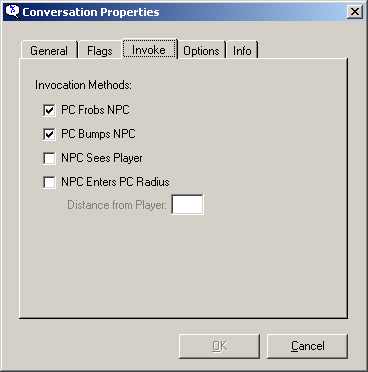
PC Bumps NPC and NPC sees player were never actually implemented so you can check them if you
want but it won't do a thing! : ) Just leave these options how they are so that the conversation will activate when you right
click on the NPC.
Now click the next tab to the right, the Options tab, there are a lot of check boxes here but
only five of them do anything.
Conversation Options Window

Below is a list of the options and what they do:
Display Conversation Only Once => Pretty self explanitory, check this box if you only want the conversation to be played once.
DataLink Conversation => Check this box if you want the conversation to be played through the infolink
Non-interactive Conversation => Check this is combination with "Remain in First-Person Mode" to create "blocked" conversations, which are played
while you are still in first person mode, you will need to check these for overheard conversations and barks which are explained in the Barks tutorial.
Remain in First-Person Mode =>See above.
Random Camera Placement => This option was never implemented and does nothing.
Can Be Interrupted By Another Conversation => This option also does nothing, by defult, all Deus Ex conversations can be interrupted so this does
nothing
Absolutely CANNOT be Interrupted => If you check this the conversation cannot be interrupted by any other conversations.
For this tutorial you don't need to change anything here, you can uncheck "Display Conversation
Only Once" if you want though. Now click ok, and your new conversation will appear in the left frame.
The new conversation appears in the left frame

You will notice that beside the little head is says "MJ12Troop" that is the bindname of the NPC
that owns the conversation. If you click on the little plus sign to the right of the head, you can see all of the conversations
that are owned by that particular NPC. In this case our "Escape" conversation is the only one owned by the the MJ12 Troop.
Once you have clicked on the plus sign beside the little head, click the "Escape" conversation
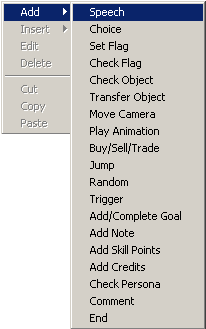
to highlight it so that we can edit this conversation. Adding speach to your conversation is actually fairly simple, to add
the first line of the conversation, right click in the right frame, put your mouse over Add and from the menu that appears
select "Speech"
Adding Speech
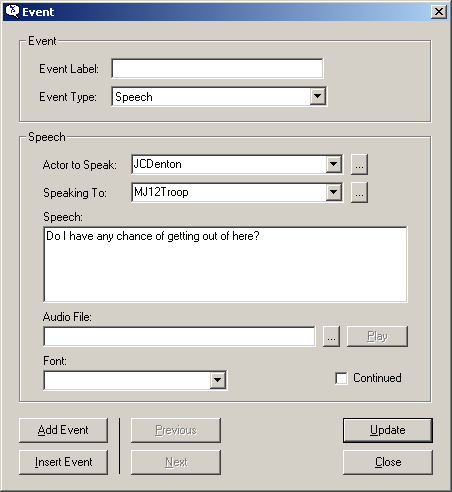
When you have clicked on Speech, an event window like the one below will pop up. You can leave
the Event Label text box blank and the Event Type is already set to Speech, which is what we want. We want the player to speak
first, so in the Actor To Speak box type in "JCDenton" without the quotes of course. And we want the player to be talking
to the MJ12Troop, but instead of typing it into the Speaking To text box you can just click on the arrow to the right of it and
select "MJ12Troop" you can do this because you added it to the list earlier. In the speech box, copy what is in the picture
below. You can leave all of the other boxes blank.
Adding speech step 2
To get the speech to show up in the main window click the Update button and the line of text should
appear in the right frame just like below,
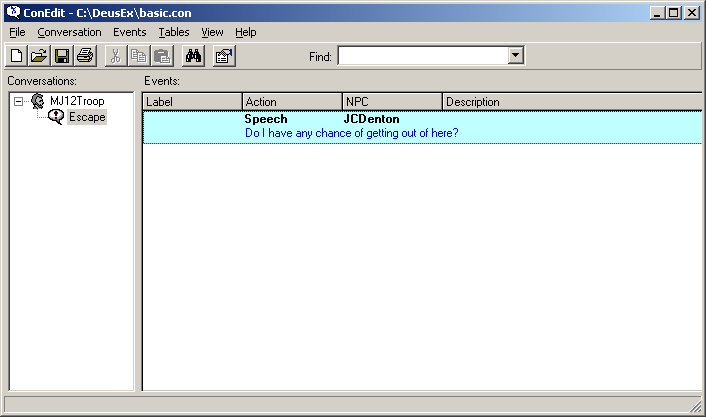
The speech window should still be open, so you might have to move it to see the text that you just
added. Now, to complete the rest of the conversation we have to add more speach events. For our next line we want to reverse
who is speaking to who (Instead of JCDenton speaking to the Troop we want the Troop speaking to JC) To do this all you have
to do is click the Add Event button in the bottom left corner of the Event window and it will clear the speach box and reverse
the speaker and the listener. We want our conversation to be like the one below, so after you have clicked Add Event to reset
the boxes, create the next line of speach using the same method as above. After you have added all of the speach you must add an
"End" event to tell the game that the conversation is over, this is done by right clicking in the right fram and selecting Add => End
The end event is not actually required for our simple conversation but you should get in the habit for when you want to do more compex
conversations involving choices and flags.
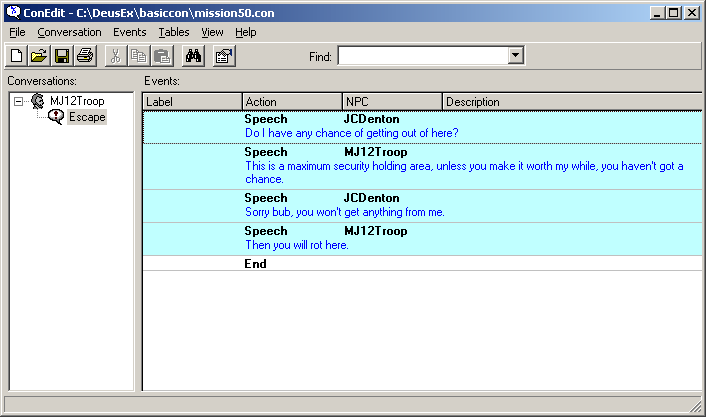
And there is your conversation, of course you have to save it and do a few other things before it
can be used in your level, so just follow along for a little longer and you'll be done in no time.
I am going to assume that you already know how to make a package (if not please read our Package
tutorial) save your conversation into the root of your package and call it Mission50.con.
You must add a new .uc file to the classes folder in your package so that your conversation will
be compiled. Go into your classes folder, right click and select New => Text Document. Name the file ImportConversations.uc and open it.
Inside the file paste the following and save it.
class ImportConversations expands Object
abstract;
// Import conversations
#exec CONVERSATION IMPORT FILE="Mission50.Con"
The jargon above that you pasted into the file just tells the compiler where to find your conversation
file. If you made more than one conversation file you would have to add exec lines for them, it's not hard to do, just copy the exec line
and replace Mission50.com with the name of your new conversation file so it would look like this.
The following is an example, you do not need to do it, in fact, don't
class ImportConversations expands Object
abstract;
// Import conversations
#exec CONVERSATION IMPORT FILE="Mission50.Con"
#exec CONVERSATION IMPORT FILE="Mission99.Con"
Example Ends
Now that you have the nessesary file you must compile using UCCMAKE and continue to the next step.
Now for the final step you have to start up the DX Editor and make a small room, don't bother to make
it fancy and then add a DuesExLevelInfo, some lights and a playerstart. Also remember to add our MJ12Troop so we can talk to him, he is
found in Classes => Pawn => ScriptedPawn => HumanMilitary. Open up the DuesExLevelInfo properties and expand DeusExLevelInfo.
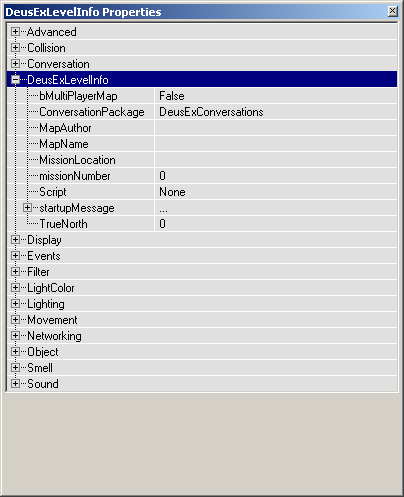
We only need to worry about a few of these settings. The ConversationPackage line is the name of the package that your conversation is in so type in
the name of your package, I would enter basiccon as that is what my package is called. bMultiPlayerMap pretty much explaines itself, so leave it how it is. For MapAuthor, MissionLocation and MapName you can put whatever you like,
but for MissionNumber you must enter the same mission number that you set your conversation to in ConEdit, in this case it
would be 50 so put that in. After everything has been filed out, compare it to the pic below, everything should be the same
except for MapAuthor, MissionLocation and MapName.
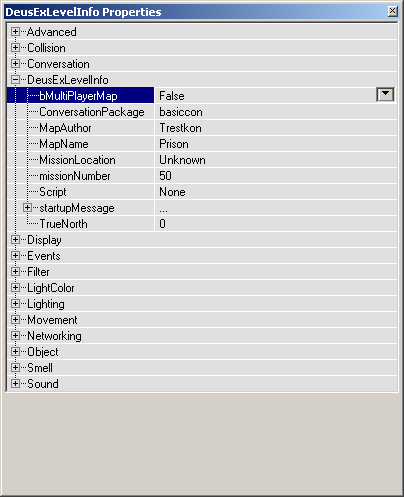
Alrighty, everything is now set up for your very first conversation test run, so fire up your level and talk to the troop. And Voila!

| 


