Lighting
SniperBoB@planetdeusex.com
Know whats really great about the unreal engine? It's ability to produce realy fast, realy great looking lighting effects. Take a look at this example:
In editor Without lights:
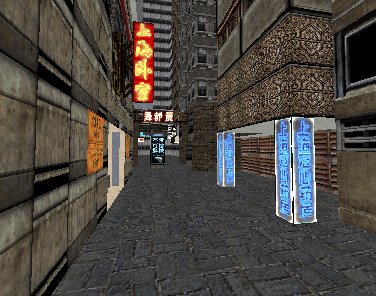
With lights:
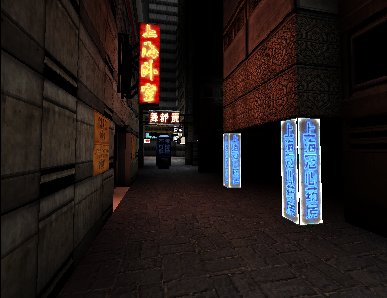
In engine shots:
(these are just so pretty I had to put them here)

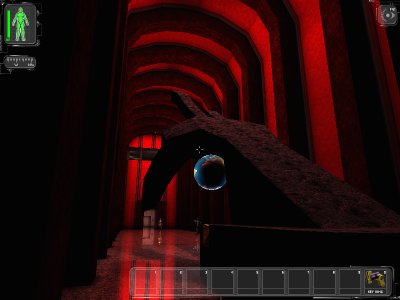
You should recognise these locations from the game. Both of them are excellent examples of what a finished product should look like. However our lighting will be much simplier it will still turn out great effects! I'd never teach you to turn out like CRAP!!
Before we begin I want you to look at the first 2 screen shots. They are from
the editor. Since the editor and the engine are pretty much one and the same
the editor outputs some increadably results! You can get a almost definite look
of what you want in the editor, with out having to open up the game each time.
AND THE UNREAL ENGINE COMPILES REALY REALY FAST!! I LAUGH IN THE FACE OF YOU
QUAKE MAPPERS!! HAHA
(note. if that makes no sense... plz ignore it...)
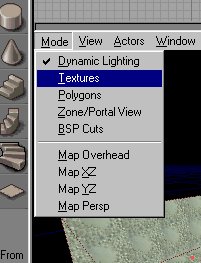
Veiw modes:
UnrealEd has several modes for the 3d veiw. For this tutorial
we are only interested in Dynamic Lighting and Textures.
Create your room and add a player start and deusexlevelinfo....
you know the drill
I made the room 256 units tall and 512 by 512 for the width and breadth.
Swap to texture mode by clicking modes then textures in the 3D window and now you have your map ready to be textured. You can do it anyway you like but make it look nice and try to keep it lined up, after making it look good is what lighting and texturing is all about. You can texture in dynamic lighting as well, but on some larger maps it lags and makes it hard to work. I recomend leaving only lighting to dynamic lighting mode, and examining your map. All other construction should be done in texture mode.
Heres what my room looks like:
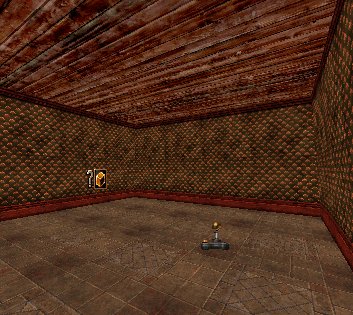
Now we can add lights. This is rather easy, getting them to look good is hard :-) To add a light, in the 3d Veiw right click on the ceiling. Then select add light here. Or just hold L and click where you want the light. Now hit rebuild. (F8)
What the **** you say? Its normal looking!! I KNOW!! switch to Dynamic Lighting
in the 3D windows mode drop down. You get something like this:
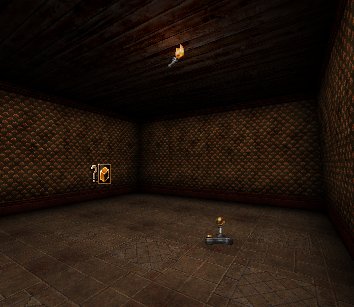
Looks good huh? WRONG! IT LOOKS LIKE CRAP! Lets make it look better!
Delete that light and rebuild the map. Way to dark you say? Pitch black in
fact! No problem! Just switch to texture mode!!
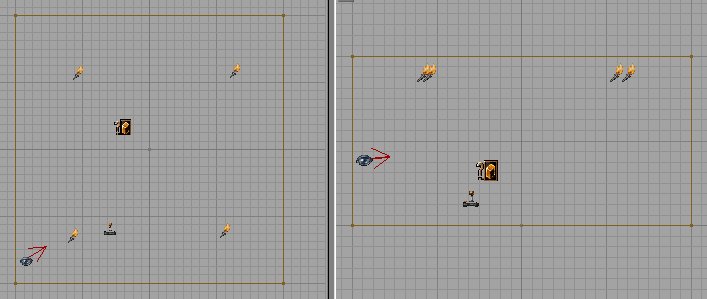
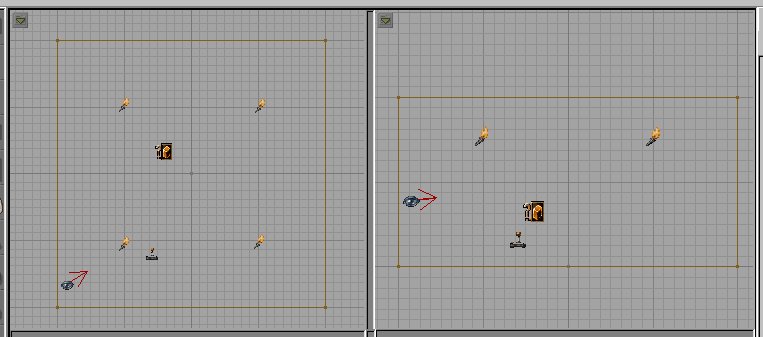
Now add 4 lights to the room 1 in each corner... like this:
You didnt have to delete that light. You could have just moved it, but hey....
we got unlimited lights... :-) (not to mention they cost nothing....-Xlax)
Ok now rebuild and goto dynamic lighting mode:
Oh my that looks BAD!! UCK!! Why? Because first of all the lights are way to
close to the ceiling, the unreal engine dont like that :-) move them down a
bit, and while your at that make them at even distances like this:
If you rebuild that it might look even worse... WHY AM I DOING THIS TO YOU? to teach you a lesson! ALL UNREAL LIGHTS ARE ADDED 2 BRIGHT!! I hope all of you NEVER EVER use a light with default properties in yuour levels. We will fix this now...
Select all of the lights by holding control and clicking them all in one view. Make them all green, Now still holding control right click on one of them. Let go of control and click light properties. In ( ) should be "4 selected" If not go do the control thing again.
Open the lighting and light color tabs. like this:
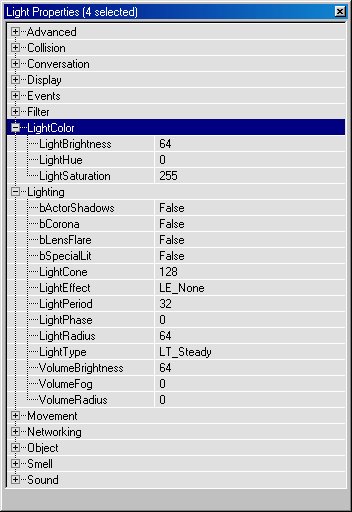
We are mainly interested in all of the light color tab and light radius, We
will get to the rest later.
Lower the brightness to about 25. and rebuild. Looks much better huh? Now we will do the light radius. Click the little green arrow in your 2D veiws, and goto actors/radii veiw. You have to do this for all of the 3, 2D veiws. If you zoom out you will see big red circles around your selected lights. Open there properties and make there radii much smaller. You want the circiles to just about cover the whole room. I used a value of 20.
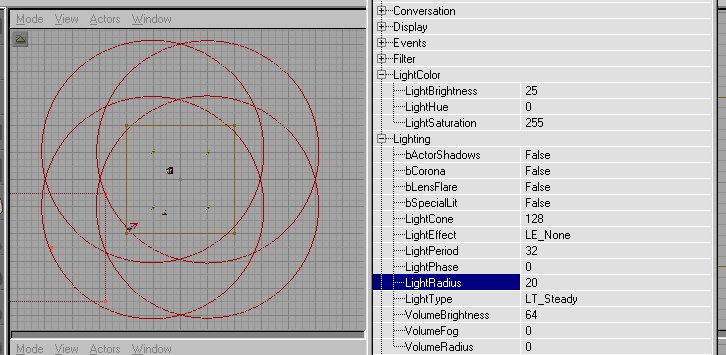
You can play with that to your likeing then readjust the brigness, I turned it up to 40.
Now, you have to change all your 2D views back to there normal actor mode (full
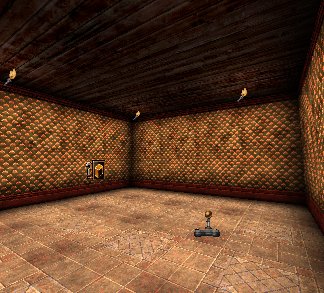
actor veiw). If you want add in some light fixtures and then you come up with
our finished product (for this part of the tut at least) That looks like this:

The actors are hidden and i used an unlit property on the lights :-)
Looks good huh?
![]()