NPCs [3 of 3] - Movement
DeX@planetdeusex.com
This tutorial is about moving NPCs. You'll learn about orders and patol routes.
Green Text is stuff you can click on or select in UnrealEd.
Blue Text is stuff you have to type.*Note* This tutorial assumes you've done the Getting started with UnrealEd, the Deus Ex level editor the texturing and the objects tutorials. Also the last two NPC tutorials.
1. Use the map you created in the last tutorial, you had better set the NPC's alliances to 1 (friendly) towards you.
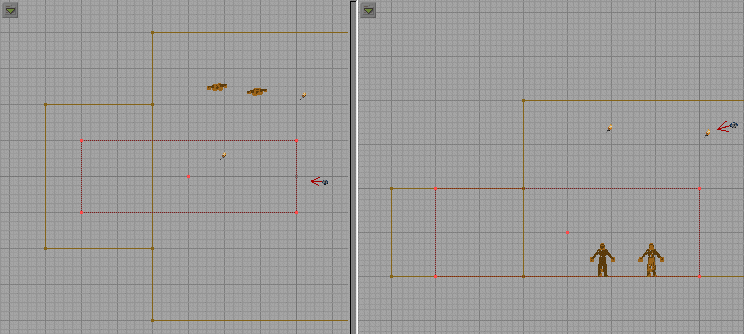
2. We are now going to create an obstacle for one of our NPCs to navigate around. Create a cube (256*512*384). Put it by the side of the large room as shown, select the texture you want and subtract the brush.
3. You should now have created a smaller section to you room. Create another cube (256*256*768) place it as shown to create a large wall extending into the smaller room you made, to make a corridor. Add the brush. Now add some lights in the corridor.
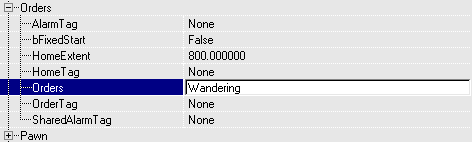
4. You may have noticed that when the NPCs don't attack you they will just wander around. This is because they have been ordered to. Go to one of the NPCs properties and expand Orders.
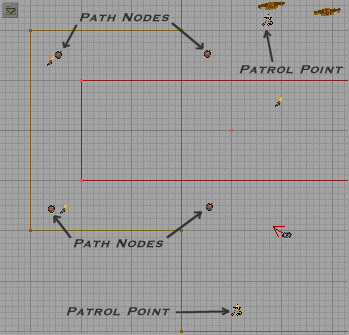
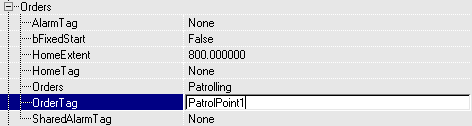
5. Look at the Orders value. This gives an NPC an order. Look at this table to view all the different types of order. We want our NPC to patrol on a patrol route. In the Orders value type Patrolling and in the OrderTag type PatrolPoint1. The OrderTag value sets something which an order acts upon. For example if you gave the order of sitting then you could type in what chair to sit on in the OrderTag value.
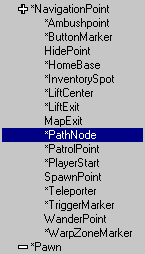
6. We now need to add some patrol points. In the classes browser expand NavigationPoint and select PatrolPoint.
7. In the 3D view add a patrol point near your NPC as you would with all objects.
8. Now select PathNode from the classes browser.
9. Add the paths nodes in the 3D view, as shown in this 2D view. Also add a second patrol point near the wall, making sure it has a clear line of sight to the last path node (you can check in the 3D view). Think of patrol points as stop or pause points (more on this in a bit) and path nodes, well as path nodes that an NPC can move along. When adding path nodes make sure they can all see each other and are no more than 700 units apart.
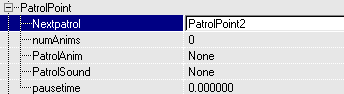
10. Now we need to link the two patrol points to make our NPC go back and forth between them. Go to the properties of the first patrol point. Expand Events and type PatrolPoint1 in then Tag value. Note this is what we typed for the OrderTag value of the NPC.
11. Expand PatrolPoint. In the Nextpatrol value type PatrolPoint2. Now go to the second patrol point change the Tag value to PatrolPoint2 and the Nextpatrol value to PatrolPoint1. Also look at the pausetime value. This sets the time in seconds you want an NPC to wait at a patrol point. When they wait, they will stand still, facing the direction the patrol point is facing (Hold control, right click on an object and move the mouse in a 2D view to rotate it). After the set time, the NPC will move to the next patrol point. If you don't specify a next patrol point the NPC will stop and stand in the same direction as the patrol point.
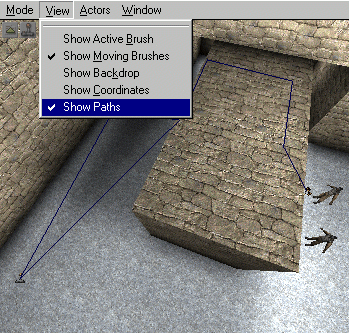
12. Almost done. Press F8, click on the Lighting tab and click Paths Define. Didn't do anything you say? In the 3D view click view on the menu and Show Paths. All the paths and patrol points should link with blue lines. If not then make sure they can see each other and are less than 700 units apart. If they link with a red line it means the patrol points or path nodes can see each other, but not very clearly. Not all NPCs will be able to pass along these paths. Make sure they can clearly be seen by each other. The path lines also seem to connect to the player start for some reason.
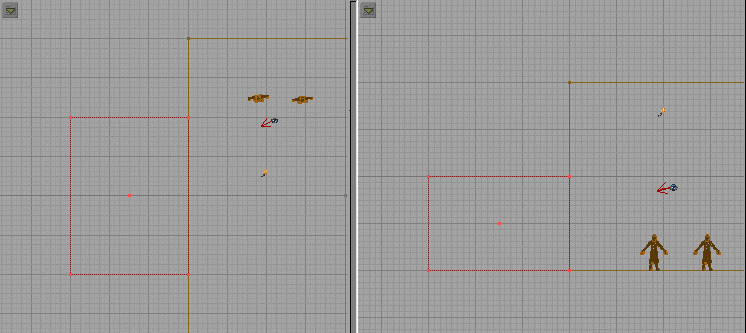
13. That's it. Rebuild your level, save it and play it. Download this level. Have a look at this table of orders and try and make the second NPC follow the other.
14. More on NPCs - If you want, look at the different sections in an NPC's properties for example AI, Fears, Reactions or Stimuli. Remember to use the trusty Editor Documentation for descriptions.