Movers are an essencial part of all maps, so here I will cover how to make them and later I will cover the Deus Ex properties of them... such as lock strength
1. First Launch UnrealEd.
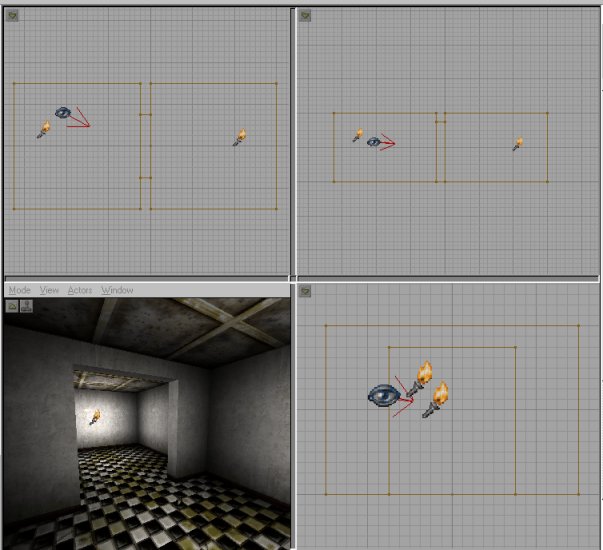
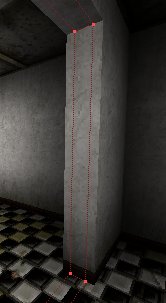
2. We will start with a simple sliding door that moves when you frob it (use it). Build a 2 room map and connect them by a 16 unit thick doorway. (the default grid size is 16 units, if you right click in one of the 4 views you can change the gride size, it is recomented to keep the grid to 16, in this case you will have to lower it to 8 to make the doorway in the correct spot... there should be no need to ever raise it above 16)
(I textured and added lighting to it, to look nice)3. Add a player start in one room and then a deus ex level info
4. I would now like to introduce you to my friend, "The Workshop". Who is "The Workshop" you ask? Well a better question is what is it. The Workshop is a big ass room off to the side of your map that is used to construct objects that will be used in your maps with out effecting the map it self. So how do you build a workshop? That's the easy part, just open the block building properties and make type some big numbers in there... to ensure that they are multiples of 32 just type "32*X" replace X with a number, I usually use "32*16" cus it fits the scale nicely... pop that number into all 3 feilds and hit build then carve it out.
5. Rebuild the map, you will have to change to texture mode in th
e 3d window to see the workshop properly. It should look like this:
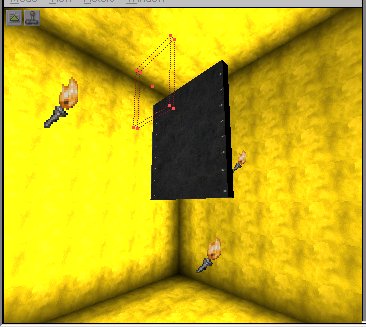
6. Now we must create the brush that will be used as our door, then turn it into a door. Create the doors shape with the red builder brush, making the door a little thinner than the door way, I made it half the width, again lowering the grid to make sure it was the right size:
7. Now move that builder brush to the center of the workshop and click add to world
This button works the like the subtract button only instead of removing stuff from the world it adds it.
8. Go ahead and texture the door to your liking and then add lights around it, rebuild and change to dynamic lighting mode in the 3d veiw. When you create your door its default lighting and texures will match those exactly. (Don't worry how the work shop looks when your done with it, because no one will ever see it but you, and were gonna delete it when we are all done.) Make the lights on the door similar to the lights in the room.
This is how my door looks, its realy simple, don't worry about getting it to look like mine, just get it done.
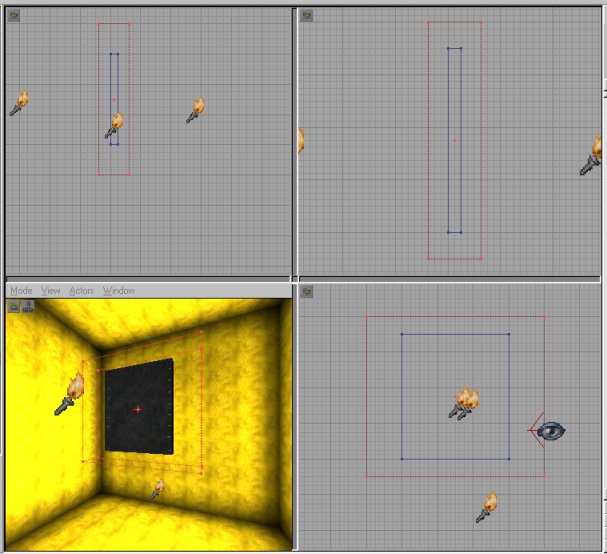
9. Now you have to turn that door into a mover, easier said then done... make the red brush completly surround the door and only the door. Just make sure the center point of the builder brush lines up perfectly with the center point of the blue brush. Like this:
10. Now you have to intersect the brush. Press Brush >> Intersect, or Press Ctrl + N, or use the intersect button:
11. Now it looks like you could have just hit build cube again to select it like that, but that wouldn't have worked. Because right now that little red brush has saved the size, shape, textures, texture scaling, alignment, properties, and lighting... maybe even some other things I forgot to mention!!! So go ahead and move that red brush into place, but don't press the mover button just yet. You will forget a very, very important step! You must first specify the mover type you want to add! then you can add the mover.
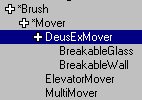
12. To do this you must change to the class browser and navigate to *brush >> *mover >> DeusExMover
see here:
13. Now that you have clicked on DeusExMover and it's ready to go you can click the mover button:
14. OH NO!!! WHERE IS YOUR MOVER?!?!? AND WTF IS THIS PURPLE BOX? Well relax, that purple box is your mover. It's just see though and purple :-) Move your reb brush out of the way, but leave the purple one there.
You can not see a mover in the editor, just its purple outline. The purple out line shows through all walls in the 3D view, this can be irritating when you are editing other parts of the map. You can hide all movers by going to Veiw >> Show Moving Brushs on the 3D veiw menu bar. Make sure you change that setting back when you are done!! Same goes for the active brush (the red builder one) but it is recomended that you NEVER HIDE THE RED BRUSH!! Just move it out of the way.
15. Now we must make the mover... MOVE! To do this you must specify key frames. A key frame is a posision of change and then you allow the Unreal engine to produce the other frames for you. Right click on the mover (you have to right click on the border) and select Mover Key Frame >> Key 1
Heres a quick explanation of the key frames that are listed there: The Base key (or 0 key) frame is the starting point. This is how the mover will look when the map is loaded. All other keys are points to move to. Most movers will only need 0 and 1, but for the man hole covers and other movers you can use many, 1 for the man hole over to go up and 2 for it to slide over, etc. Don't try this now, we will cover that later.
16. Now that key frame 1 is selected you must move the mover into its new position. I left a little lit so the door doesn't just vanish:
Don't worry about that red arrow on the mover. Mine is off to the side because I scewed up and you don't even need to worry about that now.
17. It is important that you make the mover key frame 0 again when you have positioned the key 1. Use the same method. Right click on the mover (you have to right click on the border) and select Mover Key Frame >> Key 0. To check your key frames change to 1 and back to 0 one more time.
18. That should be enough for the mover to work! Rebuild and play! All you need to do is use the door (frob it) for it to open.
The next movers tutorial will cover rotating movers, other mover properties and mover sounds. Save this map for that! (you could delete the workshop, but we may need it for the next tutorial)
If you have problems try deleting the mover, rebuilding the map then re-adding the mover. If this doesn't work you are welcome to email Xlax or myself.
