 |
|
Lower Seattle - Trickle Down
Economics At Work Listen to the bums. Chat with them for information. Turn east and pop open the sewer great for a little recon. Kill the two Karkians down below (shotgun at close range works well). Claim the goods.
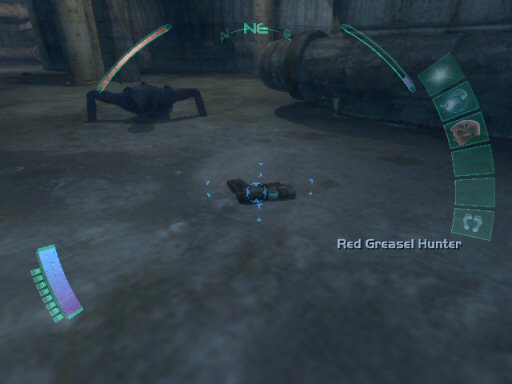
A medkit in one corner. In the other corner by the dead body an energy blade, concussion grenade, 100 credits, 50 credits, and a scrambler prox mine. The pistol however is no ordinary pistol, its the Red Greasel Hunter. Go back up and dive the dumpster for an ammo clip and bread. Enter the Greasel Pit to the south. Go ahead and accept the weapon code. Enter. Talk to Sid Black, he's the one who can't remember Cind- er- Sandy's name. Primary Goal: Pilot Sid: Liberate Jet Go and chat with the bartender. Check the lockers behind him for a multitool and 50 credits. Turn around. Walk west from the lockers and talk with Leo. Pick up the multitool near the Holo Jukebox. Talk with the Thug and Order Seeker. Leave the room and walk north to the poolroom. Liberate the 50 credits from the pool table and check out the Public Terminal. Walk around back and down the stairs. Take the multitool from the lockers at the bottom. Talk with the Bookie. Scoop up the 3 credit chips (25, 25, and 50). Talk with everyone in the Pit. Secondary Goal: Greasel Trainer: Kill Gob-zilla Now talk with the Bookie again and place your bet on Green Dragon. Talk with the trainers then the Bookie for your scrip. Go to the top of the stairs and make a right. Enter the room at the end of the hall and listen to Ava Johnson over the Holocomm. Secondary Goal: Pilot Ava: Rescue Helicopter Take the multitool from the shelf on your left and leave the Greasel Pit. Walk east and turn right. Go up the stairs. Talk with the Omar Trader. He will give you a black market biomod canister. I would also suggest purchasing the additional black market biomod canister as well. For me, I finished upgrading my Hack mod to Level 3. Check out the Public Terminal on your left as you leave the Omar Trader. Travel southeast and use the keypad. Enter the Order "church".
If Not Faith Then Firepower?
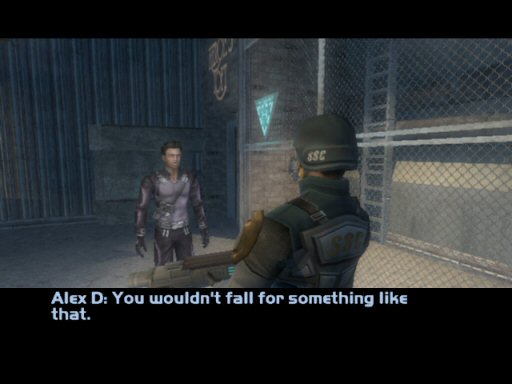
Chat with all the Seekers. Approach the altar and listen to Her Holiness for a bit. Look under the altar platform for a boltcaster and two phosphorous flares. Enter the office to the southeast as Her Holiness suggested. Primary Goal: Order Traitor: Find Lamar Take the ammo clip and check out the chest for scrambler prox mine, noisemaker grenade, 100 credits, and a spiderbomb. Run behind the altar to snag two 100 credit donations. Continue north through the maintenance door. Take out the two spiderbots on east end of the malfunctioning generator. You can also hack a terminal to control a turret or disable the generator by using a multitool on the power panel. Head back to find a medbot. Nearby is an emp grenade, and an ammo clip. Turn around and you can grab a concussion prox mine. Also from this side approach the electric discharge and look left for an energy cell. Crawl under the grate where the spiderbots patrolled. You'll find an ammo clip, multitool, and an increased damage mod. Leave the Church heading north. Turn right to enter Heron's Loft. Crouch behind the ATM to hack it. Guards get upset when you do these things. Check the dumpster for food and a multitool. Approach the guard and have a chat. Secondary Goal: Destroy Sak
Enter Heron's Loft. Open the first door on your left and chat with the owner of QueeQueg's coffee. Secondary Goal: Coffee Wars: Hack Zoning Database While you're inside take a few things (softkey, 25 credits, food, medkit, etc.) Continue down the hall. Apartment 22 houses Gob-zilla but we'll check that out later. For now, climb the elevator shaft to the top. Turn right and enter the office on your left. Talk with Sophia Sak. You could bribe Sophia but that would be easy. Take the energy cell and leave. Across from her office you'll find the guard barracks. Raid the chests. You can find 50 credits, 2 medkits, a concussion grenade, an ammo clip, a refire rate weapon mod and a datacube with the security system login. Walk out. Turn left then left again. Use the Security Computer to disable security. Enter the hallway. Proceed east down the long hallway and open the door. Move forward just enough to trigger the conversation between the two guards. Pull back and close the door. Take down the guard patrolling the hallway with your riot baton. If you take him from behind he should go down before anyone hears (especially if you keep ALL the doors closed). Go past the Security Computer and outside. Turn right and right again. Silently take down the female guard. Pick up her flashbomb. Now move out onto the helipad and take down the other guard. Next, toss a flashbang into Sophia's office (or use the alt-fire on the shotgun or SMG). Take them both. (Alternately, if you have a glass destabilizer, knock out Sophia's office window. Take her down. When her personal guard catches up with you Sophia will be gone and you'll be lined up for a clear shot. Finally, from the edge of the helipad dispatch the remaining guard. if you stick with the boltcaster and riot prod no one has to die. Enter the door to Sak's Hangar (east). |
||||||||