 |
|
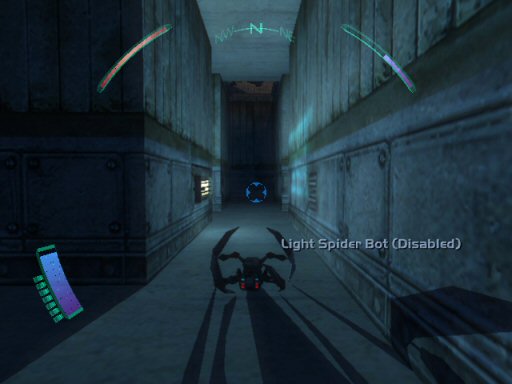
Taking Out The Trash Four guards patrol the area. You can either take them down stealthy-like from behind the crates or for a bolder approach head north up the ladder. Guards won't chase you up there and if you monitor the guard patrols you can sneak up there with ease. With the guards out you may still have to deal with the hangar turret. The guard that patrols the south platform has a sniper rifle. Or, if you're very sneaky, take down the guard on the north catwalk. From there you can hack a Security Computer to disable everything. At that point any remaining guards are pretty easy. Oh, and don't forgot the two bots patrolling below. Primary Goal: Pilot Sid: Notify
If you check down below shoot the toxic barrel to clear it out. Look around and you can find a medkit atop a crate. Over where the toxic barrel is are two areas. One, where the barrel is, has an energy cell and multitool. The other has an emp grenade, crowbar, and 100 credits. Climb up when you hear the beeping. Its the Pilot Beacon. Below it is a datacube with some details. Climb the ramp up and enter the weapon storage area (glass destabilizer works well for this). Lots of stuff here, the most interesting being the fragmentary round mod, ammo scavenger mod and the repairbot. Under the weapon storage area you can find a spiderbomb atop a crate. Leave the hangar.
Gob-Zilla, I Choose You! Climb down the ladder on the side of the helipad. Grab an ammo clip from atop the crates and open the gate. Go back into Heron's Loft. Climb down to the bottom of the shaft and consider a few choices. Crawl under the lift and grab the multitool and flashbang grenade. Open the vent grate and climb up the shaft. Take out Gob-zilla and perhaps its owner. Alternately, go outside and climb up the fire escape. Break the window and take out Gob-zilla from there. You can choose to tranq Gob-zilla but you lose your reward from Eddie. Try it out. Secondary Goal: Greasel Trainer: Collect Reward Either way, get into the apartment for a softkey and ammo from atop the crate. Leave the apartment. If you use the exit in the back alley to reach the slums, grab the multitool on your left as you leave. Return to the Greasel Pit. After you get past the weapons check, talk with Sid. Primary Goal: Pilot Sid: Meet at Jet Head down to the Greasel Pit. Don't make any bets yet. Talk with Eddie. Now talk with the Bookie. Bet on Snake-Eyes. Talk to everyone after the match is over. Collect your money from the Bookie. (Note: Sometimes the Claw will win. I haven't figured out if this is random or perhaps based on what trainer you stand next to.)
Leave the pit and return to the Order Church. Don't enter it. Turn around and you will find the QueeQuegs the Peqod's owner asked you to torch. Check the nearby dumpster for an energy cell. Open the front door and toss a grenade onto the four boxes of coffee. Clear out before the turret goes live. Secondary Goal: Coffee Wars: Collect Reward Talk with the Omar if you haven't already. He has a black market biomod available for purchse. You can try raiding the Omar's chest of goodies but he may not like it. Inside you'll find two ammo clips, medkit, and a scrambler prox mine. Probably better to stay on good relations right now. Return to the Inclinator by heading north. Enter the door on your left where Mack and Lo-town Lucy are.
What Goes Down Is Coming Up A few things have changed. The Templars have taken over. Carefully take out the two guards on the other side of the crate and their friend overlooking the room from a balcony. Take the inclinator up. Sneak over to the west wall. Move forward over the railing and then up the ladder on your left. Be quick and the two Templars won't notice. Continue north. Crouch and jump over the railing and onto the edge of the north wall. Follow it south to the I-beam intersection. Turn right then left and into the vent. At the bottom of the vent, close the grate if its open and move forward to hear the conversation. Pop it open when they are finished and take out the Templars. Close the vent cover between your shots. When done, crawl out and read the datacube on the desk.
Primary Goal: Order Traitor: Report to Church At this point you know where everything is so its just cleanup. Report to the Church to discuss the Mako situation. Talk with the manager of Pequod's for your reward. At the WTO, go to the Civic Manager's office and use his Security Computer to help the manager of QueeQueg who you will then have to report back to for your reward. At this point you can leave on Sid Black's jet. Or tackle one last challenge. Take on the WTO Air Terminal.
Flying High, Flying Proud, Flying
FREE Use the Metro to reach the WTO Air Terminal. Go all the way back to the office area. Enter the elevator protected by the two guards. Get off and approach the door to the restricted area. Secondary Goal: Pilot Ava: Disable Missile Batteries Approach the crate to the southwest. Carefully go around its right side to trigger the conversation then pull back to the entry room. Be careful of the patrolling bot. Close the door when you need safety. When the guard has his back turned riot baton him to sleep. Carry his body to the entry room. Now, go out and wait for the female guard on the left to return. Take her down. Climb up the stairs you saw when you first opened the hangar door. Drop an emp grenade on the patrolling bot. Now walk south and enter the Control Tower (If you don't have hack get the code from a datacube down below. Use the ladder on the southeast end of the landing pad. Wait for the guard to pass then jump her. Head west. Just before you break the green beams look left at the metal machine. Near it is the datacube. Now get back up the ladder.). From the window of the tower, take out the remaining bot. The nearby chest contains an increased damage mod. Open the vent to the south and crawl down. Grab the multitool on your left before enter the storage room. Hack the terminal to disable the missile battery (or blow it up, its right outside). Before you leave the room grab the softkey on the floor next to the barrel. Proceed north across the landing pad to the other room. Dodge the camera and then enter the storage room to hack the Security Computer. Disable everything (or blow it up). Secondary Goal: Pilot Ava: Activate Beacon
Check out the medkit and datacube behind the barrels. Exit the room. Head east and enter the 2nd (last) door on your right. The one that goes under the landing pad. Go down the hall, turn right twice and use a multitool to open the door. Inside you'll find a repair bot, a concussion grenade, a medkit and a chest with black market biomod and a spiderbomb. Run back to the Control Tower and use the Pilot Beacon. Three guards will appear you can handle the one near you and the one atop the landing pad safely from the tower. Go to Ava's chopper and leave.
Conspiratorial nod to: Scorpio for Black Market expertise |
|||||||||||