Water
During this tutorial you will learn how to:
- Add water into your maps
- Use the 'Build a sheet' function
- Add a WaterZone
Lets begin.
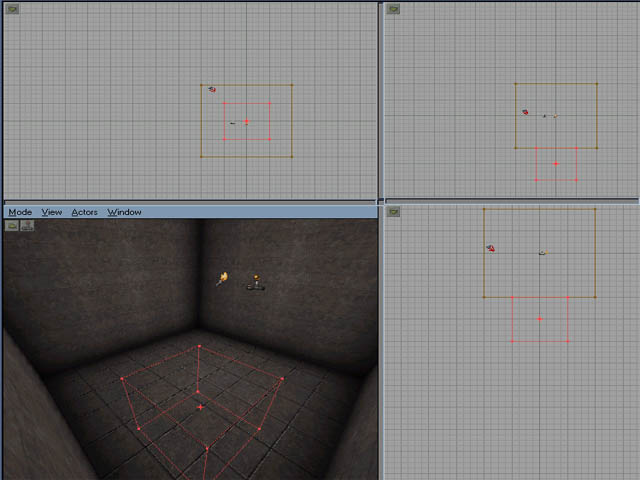
Right click on the 'Build a Cube' button and build a 256x256x256
cube ... postion it so it is in the centre of your map in the overhead
view and inline with the floor in the two side views ... like in
this pic ...
Now subtract this brush ... press  or Ctrl+S
You should now have a indent or well in the floor of your map ...
this is where we will add the water.
Adding the Water
Load the texture package 'CoreTexWater' ... choose the 'bluewater'
texture
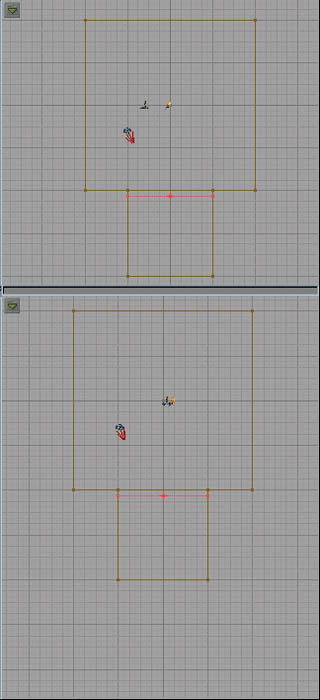
Now right click on the 'Build a Sheet' button ... go to Sheet Properties
... set the sizes (U+V) both to 256 then ... make sure the Floor/Ceiling
button is checked ... the press Build ... postion the sheet till
it is one square below the top of the indent you made ... see this
example pic. It is important that
all sides of the sheet touch other
surfaces, with no gaps.
Press the 'Add Special Brush' button ... 
In the menu that pops up press the drop-down menu and choose 'Water'
...

Now press 'Add Special' ... in the map perspective view you should
see the water texture appear.
Adding the WaterZone
Next you need to add a WaterZone. This tells the engine which
areas are underwater and which are not. That is why the Sheet you
added must always be touching another
surface ... think of the sheet like the 'boundary' of the water
... if you add a WaterZone above the sheet then the whole area above
the sheet will be underwater ... if you add a WaterZone below the
sheet then that area will be underwater. If there was a gap between
the sheet and the other surfaces and the area you wanted underwater
was not fully 'sealed' off then both areas would become underwater
... ok.
To add a WaterZone choose 'Classes' in the Browser ... then expand
Info ... and then ZoneInfo ... you should now see WaterZone
... right click inside your map and choose
'Add WaterZone here' ... move the WaterZone until it is under
the sheet.
Now press F8 and rebuild your map ... then Ctrl+P to run it ...
have a look around. Now that was a refreshing swim ... apart from
those of you sadists who drowned poor JC ... I know some of you
did it ...
Anyway, so you've made water.
YAY!
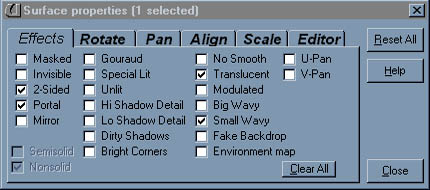
But what's that I hear you cry ... the water was still and lifeless
... ah my fellow mapper we can soon sort that out ... left click
on the top surface of your water sheet to highlight it ... now right
click and go to 'Surface Properties' ... check the box called 'Small
Wavy' ... rebuild you map and WAHEY!
Run it and you'll get some funktastic waves ...
Animated Water
While the water moved about the more observant of you may have
noticed that it wasn't animated ... like the water in the Hong Kong
Canal level ... so I'll tell you how to do it
Load the 'Effects' texture package ... you may have noticed that
'Effects' is already loaded into the Browser when you start the
editor ... well done ... but not all of the textures are loaded
... so you need to load it again
Now then simply use one of these textures:
drtywater_a ... 
bluewater_a ... 
Thats all there is to it ... save the map for use in Advanced
Water which teachs you to make toxic water
/ slime ... just for you sadists ... not only can you drown
JC but burn his flesh off and give him radiation poisoning ... what
fun.
|
